2018年8月30日木曜日
memo(Kubernetes Dashboard)
Kubernetes Dashboardインストール後に以下を作成する
apiVersion: rbac.authorization.k8s.io/v1beta1
kind: ClusterRoleBinding
metadata:
  name: kubernetes-dashboard
  labels:
    k8s-app: kubernetes-dashboard
roleRef:
  apiGroup: rbac.authorization.k8s.io
  kind: ClusterRole
  name: cluster-admin
subjects:
- kind: ServiceAccount
  name: kubernetes-dashboard
  namespace: kube-system
以下を実施する
kubectl create -f dashboard-admin.yml
◼︎参照先
https://qiita.com/moukuto/items/7e6c567c482436859f59
wordpress for kubernetes(raspberry)作成手順
1)wordpressのパスワードを作成する。
$ kubectl create secret generic wordpress-secrets --from-literal=db-password=your_password
2)wordpressのマニフェストを作成する。
$ vi wordpress-deployment.yml
****************************************:
apiVersion: extensions/v1beta1
kind: Deployment
metadata:
name: wordpress-deployment
spec:
replicas: 1
template:
metadata:
labels:
app: wordpress
spec:
containers:
- name: wordpress
image: wordpress:4-php7.0
ports:
- name: http-port
containerPort: 80
env:
- name: WORDPRESS_DB_HOST
value: 127.0.0.1
- name: WORDPRESS_DB_PASSWORD
valueFrom:
secretKeyRef:
name: wordpress-secrets
key: db-password
- name: mysql
image: hypriot/rpi-mysql
ports:
- name: mysql-port
containerPort: 3306
env:
- name: MYSQL_ROOT_PASSWORD
valueFrom:
secretKeyRef:
name: wordpress-secrets
key: db-password
**************************************************
3)上記で作成したマニフェストを実行して、podの作成を行う。
$ kubectl create -f wordpress-deployment.yml
4)以下のコマンドを入力して、コンテナの進捗状況を確認してみる
kubectl describe pods
5)wordpress用のサービスのマニフェストを作成する。
vi wordpress-service.yml
***********************************
apiVersion: v1
kind: Service
metadata:
name: wordpress-service
spec:
ports:
- port: 31001
nodePort: 31001
targetPort: http-port
protocol: TCP
selector:
app: wordpress
type: NodePort
*****************************
6)上記で作成したwordpress用のサービスの作成を行う。
kubectl create -f wordpress/wordpress-service.yml
7)作成したserviceが作成されているか確認してみる。
Kubectl get services
wordpress-serviceに表示されているIPをメモ。
8)ブラウザにて、wordpressのインストールを行う
2018年8月28日火曜日
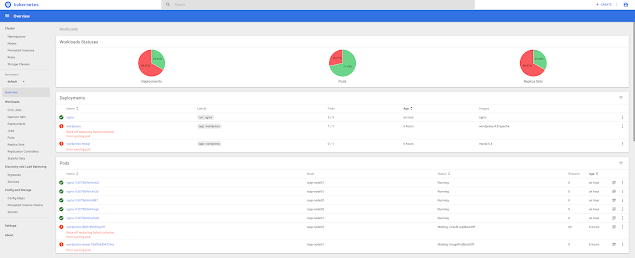
raspberry pi for Kubernetes Dashboard(認証無しにする)
1)外部アクセスからtoken経由で認証を行っても
反応がないので、認証を外す設定を行う。
上記、raspberry piの自宅環境前提になるので
自宅以外で環境ではお勧めしない。
****以下、貼り付けを行う***********************
cat <<EOF | kubectl create -f -
apiVersion: rbac.authorization.k8s.io/v1beta1
kind: ClusterRoleBinding
metadata:
  name: kubernetes-dashboard
  labels:
    k8s-app: kubernetes-dashboard
roleRef:
  apiGroup: rbac.authorization.k8s.io
  kind: ClusterRole
  name: cluster-admin
subjects:
- kind: ServiceAccount
  name: kubernetes-dashboard
  namespace: kube-system
EOF
***********************************************2)ということで、ログインが出来た

raspberry pi for kubernetes(nginxの作成)
1)nginxを5台構成にしてみる。
kubectl run nginx --image=nginx --replicas=5
2)下記で確認してみる。
kubectl get pods -o wide
3)ブラウザからアクセスできるようしたいので、serviceの設定を行う。
kubectl expose deployment nginx --port=80 --target-port=80 --type=LoadBalancer
4)以下のコマンドで確認できるはず。
kubectl get service nginx
root@rasp-master:/home/pi# kubectl get service nginx
NAME TYPE CLUSTER-IP EXTERNAL-IP PORT(S) AGE
nginx LoadBalancer 10.99.50.11 <pending> 80:30310/TCP 15s
5)ブラウザにて、各nodeのIPと上記で表示されているポート番号(今回は、30310)を入力する。
以下のWelcomeページが表示されるはず。
◾️kubernetesの削除方法
以下、手順で上記に作成したkubernetesの削除方法の手順になる。
(同様にコントローパネルからも削除は可能。)
1)サービスの削除を行う。
$ kubectl delete service nginx
2)レプリケーションコントローラの削除を行う。
$ kubectl delete deployment nginx
2018年8月27日月曜日
raspberry pi(apt-get updateができない)
1)以下、updateが実行できない。
root@rasp03:~# apt-get update
******** error内容 **************
パッケージリストを読み込んでいます... 完了
E: ロック /var/lib/apt/lists/lock が取得できませんでした - open (11: リソースが一時的に利用できません)
E: ディレクトリ /var/lib/apt/lists/ をロックできません
W: ターゲット Packages (main/binary-armhf/Packages) は /etc/apt/sources.list.d/kube.list:1 と /etc/apt/sources.list.d/kubernetes.list:1 で複数回設定されています
W: ターゲット Packages (main/binary-all/Packages) は /etc/apt/sources.list.d/kube.list:1 と /etc/apt/sources.list.d/kubernetes.list:1 で複数回設定されています
W: ターゲット Translations (main/i18n/Translation-ja_JP) は /etc/apt/sources.list.d/kube.list:1 と /etc/apt/sources.list.d/kubernetes.list:1 で複数回設定されています
W: ターゲット Translations (main/i18n/Translation-ja) は /etc/apt/sources.list.d/kube.list:1 と /etc/apt/sources.list.d/kubernetes.list:1 で複数回設定されています
W: ターゲット Translations (main/i18n/Translation-en) は /etc/apt/sources.list.d/kube.list:1 と /etc/apt/sources.list.d/kubernetes.list:1 で複数回設定されています
2)以下を削除すると解決する。
rm /etc/apt/sources.list.d/kubernetes.list
rm /var/lib/apt/lists/lock
memo(install.sh)
sudo apt install curl
sudo apt-get install apt-transport-https ca-certificates curl software-properties-common
curl -fsSL https://download.docker.com/linux/$(. /etc/os-release; echo "$ID")/gpg | sudo apt-key add -
echo "deb [arch=armhf] https://download.docker.com/linux/$(. /etc/os-release; echo "$ID") \
$(lsb_release -cs) stable" | \
sudo tee /etc/apt/sources.list.d/docker.list
sudo apt-get update
sudo apt-get install docker-ce
curl -fsSL https://packages.cloud.google.com/apt/doc/apt-key.gpg|sudo apt-key add -
echo "deb http://apt.kubernetes.io/ kubernetes-xenial main" | sudo tee /etc/apt/sources.list.d/kube.list
sudo apt-get update
apt-get install kubelet=1.8.14-00 kubeadm=1.8.14-00 kubectl=1.8.14-00 kubernetes-cni=0.5.1-00
2018年8月26日日曜日
raspberry pi(調査&プロセスの削除)
1)以下をインストールする。
sudo apt-get -y install lsof
2)削除対象のプロセスを検索する。
sudo lsof -i -P | grep "LISTEN"
3)削除対象のプロセスを削除する。
kill -9
2018年8月24日金曜日
raspberry pi(docker-composeの導入)
1)各種デベロッパーツールを導入する。
$ sudo apt-get install -y locales gcc make zlib1g zlib1g-dev libssl-dev git ca-certificates curl libsqlite3-dev libbz2-dev
2)docker-composeのソースファイルをダウンロードする。
$ git clone https://github.com/docker/compose.git
3)ダウンロードが終わったら以下のフォルダーに移動する。
$ cd compose
4)ソースファイルをビルドを行う。
$ sudo docker build -t docker-compose:armhf -f Dockerfile.armhf .
5) 以下を行う。
$ sudo docker run --rm --entrypoint="script/build/linux-entrypoint" -v $(pwd)/dist:/code/dist -v $(pwd)/.git:/code/.git "docker-compose:armhf"
2018年8月23日木曜日
raspberry pi(kubernetesの導入方法)
<材料一式>
Raspberry Pi 3 Model B : 3台
ヒートシンク : 3セット
microSDカード 16GB : 2枚
microSDカード 32GB : 1枚(家にあった余り物)
4段積層式 Raspberry Pi 3 ケース : 1セット
4ポート USB 充電器 : 1台
microUSB ケーブル : 4本
平麺LANケーブル : 4本
コンパクト無線親機 (WMR-433W) : 1台
5ポートのHUB : 1台
Raspbian stretch lite
<マシン名一覧>
Master:raspberrypi-1
node1: raspberrypi-2
node2: raspberrypi-3
◻️OSの導入方法について
1)まずは、SD Card Formatterを使ってSDカードのフォーマット行うが
詳細については、割愛する。
2)マウント先を調べる
$ diskutil list
(今回、上記の調査で、disk3であることが分かった)
3)ディスクをアンマウントを行う。
$ diskutil unmountDisk /dev/disk3
4)ディスクイメージを置いた場所に移動する
$ cd /Users/user名/Desktop
5)OSの書き込みを行う。
$ sudo dd bs=1m if=2018-06-27-raspbian-stretch-lite.img of=/dev/rdisk3 conv=sync
◻️SSHの設定
1)インストール先のSDカードに移動する。
$ cd /Volumes/boot
2)以下のからファイルを作成しないとsshが無効の状態になるので必ず行うこと。
$ touch ssh
◻️cgroupの設定
1)以下を修正する。
1)以下を修正する。
$ cd /Volumes/boot
$ vi cmdline.txt
2)修正対象のファイルにペーストを行う。
dwc_otg.lpm_enable=0 console=serial0,115200 console=tty1 root=PARTUUID=4d3ee428-02 rootfstype=ext4 cgroup_enable=cpuset cgroup_enable=memory cgroup_memory=1 elevator=deadline fsck.repair=yes rootwait quiet init=/usr/lib/raspi-config/init_resize.sh
赤文字が追加する内容
オレンジ色の箇所は、元の記載内容に合わせた方が良いかも。
◻️raspberry piにログインする
以下の方法で該当するraspberry piにログインする。
$ ssh pi@192.168.xx.xx
接続方法は、端末によって異なるが
今回は、OSXを使用しているのでTerminalから接続している。
◻️OSのアップデート
$ sudo apt-get upgrade
$ sudo apt-get install rpi-update
◻️raspi-configの設定
以下を実施を行う
$ sudo raspi-config
◻️raspi-configを実行する。
I1 Change Locale の設定
->en_GB.UTF-8 UTF-8のチェックを外し(Spaceキー),ja_JP.EUC-JP
EUC-JP とja_JP.UTF-8 UTF-8 にチェック
->Default localeをja_JP.UTF-8に設定
I2 Change Timezone で Asia/Tokyo に設定
7 Advanced Options の設定
A1 Expand Filesystem を実行して,SDカードの全容量を
使用できるように設定
A3 Memory Split で,GPUに割り当てるメモリを最小の16MBに設定
◻️ホスト名の変更
1)各ホストごとに、ホスト名の変更を行う。
sudo vi /etc/hostname
raspberrypi-1.local(masterの場合)
2)ホスト名と該当するホストのIPを追記する。
sudo vi /etc/hosts
192.168.XX.X raspberrypi-1.local(masterの場合)
3)固定IPの設定を行う。
vi /etc/dhcpcd.conf
=====以下に、設定対象の値を入力する==================
# Example static IP configuration:
interface eth0
static ip_address=192.168.13.4/24
static ip6_address=fd51:42f8:caae:d92e::ff/64
static routers=192.168.13.99
static domain_name_servers=192.168.1.200 8.8.8.8 fd51:42f8:caae:d92e::1
4)再起動を行う
sudo reboot
◼︎各ホスト毎のログイン(実施対象:master/node1/node2)
各ホスト毎にログインを行う。
$ slogin user@raspberrypi-1.local(masterのログイン方法)
◼︎rootのパスワードを設定
$ sudo passwd root
◼︎スワップを切ることで、SDカードの寿命を伸ばせるので実施してみる
$ sudo dphys-swapfile swapoff
$ sudo dphys-swapfile uninstall
$ sudo update-rc.d dphys-swapfile remove
◼︎dockerの導入を行う(実施対象:master,node1,node2)
1)必要なパッケージ類を導入する
$ sudo apt-get install apt-transport-https ca-certificates curl software-properties-common
$ curl -fsSL https://download.docker.com/linux/$(. /etc/os-release; echo "$ID")/gpg | sudo apt-key add -
2)リポジトリの追加
$ echo "deb [arch=armhf] https://download.docker.com/linux/$(. /etc/os-release; echo "$ID") \
$(lsb_release -cs) stable" | \
$ sudo tee /etc/apt/sources.list.d/docker.list
3)インストールを実行する。
$ sudo apt-get update
$ sudo apt-get install docker-ce
◼︎kubeadmのインストール(実施対象:master,node1,node2)
1)リポジトリの追加
$ curl -fsSL https://packages.cloud.google.com/apt/doc/apt-key.gpg|sudo apt-key add -
$ echo "deb http://apt.kubernetes.io/ kubernetes-xenial main" | sudo tee /etc/apt/sources.list.d/kube.list
2)インストールを行う
$ sudo apt-get update
導入方法を変更する。
$ apt-get install kubelet=1.8.14-00 kubeadm=1.8.14-00 kubectl=1.8.14-00 kubernetes-cni=0.5.1-00
◼︎Masterの設定(実施対象:master)
1)以下を実施する。
sudo kubeadm init --pod-network-cidr=10.244.0.0/16
注意:ホスト名に”アンダーバー”がついた名前で実行すると、名前を変えろとエラーが
表示されて実行できない。
NG)raspberrypi_1
OK)raspberrypi-1
pi@raspberrypi-1:~ $ sudo kubeadm init --pod-network-cidr=10.244.0.0/16
ポイント:以下の表示が出ていれば成功
******************************************************
[init] using Kubernetes version: v1.11.2
[preflight] running pre-flight checks
I0823 14:17:28.295169 3241 kernel_validator.go:81] Validating kernel version
I0823 14:17:28.295805 3241 kernel_validator.go:96] Validating kernel config
[WARNING SystemVerification]: docker version is greater than the most recently validated version. Docker version: 18.06.1-ce. Max validated version: 17.03
[preflight/images] Pulling images required for setting up a Kubernetes cluster
[preflight/images] This might take a minute or two, depending on the speed of your internet connection
[preflight/images] You can also perform this action in beforehand using 'kubeadm config images pull'
[kubelet] Writing kubelet environment file with flags to file "/var/lib/kubelet/kubeadm-flags.env"
[kubelet] Writing kubelet configuration to file "/var/lib/kubelet/config.yaml"
[preflight] Activating the kubelet service
[certificates] Generated ca certificate and key.
[certificates] Generated apiserver certificate and key.
[certificates] apiserver serving cert is signed for DNS names [raspberrypi-1.local kubernetes kubernetes.default kubernetes.default.svc kubernetes.default.svc.cluster.local] and IPs [10.96.0.1 192.168.XX.X]
[certificates] Generated apiserver-kubelet-client certificate and key.
[certificates] Generated sa key and public key.
[certificates] Generated front-proxy-ca certificate and key.
[certificates] Generated front-proxy-client certificate and key.
[certificates] Generated etcd/ca certificate and key.
[certificates] Generated etcd/server certificate and key.
[certificates] etcd/server serving cert is signed for DNS names [raspberrypi-1.local localhost] and IPs [127.0.0.1 ::1]
[certificates] Generated etcd/peer certificate and key.
[certificates] etcd/peer serving cert is signed for DNS names [raspberrypi-1.local localhost] and IPs [192.168.XX.X 127.0.0.1 ::1]
[certificates] Generated etcd/healthcheck-client certificate and key.
[certificates] Generated apiserver-etcd-client certificate and key.
[certificates] valid certificates and keys now exist in "/etc/kubernetes/pki"
[kubeconfig] Wrote KubeConfig file to disk: "/etc/kubernetes/admin.conf"
[kubeconfig] Wrote KubeConfig file to disk: "/etc/kubernetes/kubelet.conf"
[kubeconfig] Wrote KubeConfig file to disk: "/etc/kubernetes/controller-manager.conf"
[kubeconfig] Wrote KubeConfig file to disk: "/etc/kubernetes/scheduler.conf"
[controlplane] wrote Static Pod manifest for component kube-apiserver to "/etc/kubernetes/manifests/kube-apiserver.yaml"
[controlplane] wrote Static Pod manifest for component kube-controller-manager to "/etc/kubernetes/manifests/kube-controller-manager.yaml"
[controlplane] wrote Static Pod manifest for component kube-scheduler to "/etc/kubernetes/manifests/kube-scheduler.yaml"
[etcd] Wrote Static Pod manifest for a local etcd instance to "/etc/kubernetes/manifests/etcd.yaml"
[init] waiting for the kubelet to boot up the control plane as Static Pods from directory "/etc/kubernetes/manifests"
[init] this might take a minute or longer if the control plane images have to be pulled
[apiclient] All control plane components are healthy after 180.014783 seconds
[uploadconfig] storing the configuration used in ConfigMap "kubeadm-config" in the "kube-system" Namespace
[kubelet] Creating a ConfigMap "kubelet-config-1.11" in namespace kube-system with the configuration for the kubelets in the cluster
[markmaster] Marking the node raspberrypi-1.local as master by adding the label "node-role.kubernetes.io/master=''"
[markmaster] Marking the node raspberrypi-1.local as master by adding the taints [node-role.kubernetes.io/master:NoSchedule]
[patchnode] Uploading the CRI Socket information "/var/run/dockershim.sock" to the Node API object "raspberrypi-1.local" as an annotation
[bootstraptoken] using token: gkl5zc.p4ymorryoqx1ohl9
[bootstraptoken] configured RBAC rules to allow Node Bootstrap tokens to post CSRs in order for nodes to get long term certificate credentials
[bootstraptoken] configured RBAC rules to allow the csrapprover controller automatically approve CSRs from a Node Bootstrap Token
[bootstraptoken] configured RBAC rules to allow certificate rotation for all node client certificates in the cluster
[bootstraptoken] creating the "cluster-info" ConfigMap in the "kube-public" namespace
[addons] Applied essential addon: CoreDNS
[addons] Applied essential addon: kube-proxy
Your Kubernetes master has initialized successfully!
To start using your cluster, you need to run the following as a regular user:
mkdir -p $HOME/.kube
sudo cp -i /etc/kubernetes/admin.conf $HOME/.kube/config
sudo chown $(id -u):$(id -g) $HOME/.kube/config
You should now deploy a pod network to the cluster.
Run "kubectl apply -f [podnetwork].yaml" with one of the options listed at:
https://kubernetes.io/docs/concepts/cluster-administration/addons/
You can now join any number of machines by running the following on each node
as root:
kubeadm join 192.168.XX.X:6443 --token XXXXX.p4ymorryoqx1ohl9 --discovery-token-ca-cert-hash sha256:XXXXXXXXXXXXXXXXXXXXXXXX
*******************************************************************:
ポイント:上記、赤文字の箇所は、後ほど必要になるので控えておくこと!!
2)上記、kubeadm init で表示されたメッセージに従う
$ mkdir -p $HOME/.kube
$ sudo cp -i /etc/kubernetes/admin.conf $HOME/.kube/config
$ sudo chown $(id -u):$(id -g) $HOME/.kube/config
3)falnnel のデプロイを行う。
$ kubectl apply -f <(curl -s https://raw.githubusercontent.com/coreos/flannel/v0.9.1/Documentation/kube-flannel.yml |sed 's/amd64/arm/g')
ポイント:成功すれば、以下の表示が出る。
*****************************:
clusterrole.rbac.authorization.k8s.io/flannel created
clusterrolebinding.rbac.authorization.k8s.io/flannel created
serviceaccount/flannel created
configmap/kube-flannel-cfg created
daemonset.extensions/kube-flannel-ds created
*******************************
◼︎nodeのセットアップ(実施対象:node1/node2)
1)rootでログインを行う。
$ sudo su -
$ sudo su -
2)kubeadm init を実行した時に表示されたメッセージに従い
コマンドを入力して、masterに参加する。
$ kubeadm join 192.168.xx.x:6443 --token XXXXX.p4ymorryoqx1ohl9 --discovery-token-ca-cert-hash sha256:XXXXXXXXXXXXXXXXXXXXXXXX
ポイント:成功すれば、以下のようなメッセージが表示される。
******************************
[preflight] running pre-flight checks
[WARNING RequiredIPVSKernelModulesAvailable]: the IPVS proxier will not be used, because the following required kernel modules are not loaded: [ip_vs ip_vs_rr ip_vs_wrr ip_vs_sh] or no builtin kernel ipvs support: map[nf_conntrack_ipv4:{} ip_vs:{} ip_vs_rr:{} ip_vs_wrr:{} ip_vs_sh:{}]
you can solve this problem with following methods:
1. Run 'modprobe -- ' to load missing kernel modules;
2. Provide the missing builtin kernel ipvs support
I0823 14:42:35.630114 4950 kernel_validator.go:81] Validating kernel version
I0823 14:42:35.630592 4950 kernel_validator.go:96] Validating kernel config
[WARNING SystemVerification]: docker version is greater than the most recently validated version. Docker version: 18.06.1-ce. Max validated version: 17.03
[discovery] Trying to connect to API Server "192.168.xx.x:6443"
[discovery] Created cluster-info discovery client, requesting info from "https://192.168.xx.x:6443"
[discovery] Requesting info from "https://192.168.xx.x:6443" again to validate TLS against the pinned public key
[discovery] Cluster info signature and contents are valid and TLS certificate validates against pinned roots, will use API Server "192.168.xx.x:6443"
[discovery] Successfully established connection with API Server "192.168.xx.x:6443"
[kubelet] Downloading configuration for the kubelet from the "kubelet-config-1.11" ConfigMap in the kube-system namespace
[kubelet] Writing kubelet configuration to file "/var/lib/kubelet/config.yaml"
[kubelet] Writing kubelet environment file with flags to file "/var/lib/kubelet/kubeadm-flags.env"
[preflight] Activating the kubelet service
[tlsbootstrap] Waiting for the kubelet to perform the TLS Bootstrap...
[patchnode] Uploading the CRI Socket information "/var/run/dockershim.sock" to the Node API object "raspberrypi-3.local" as an annotation
This node has joined the cluster:
* Certificate signing request was sent to master and a response
was received.
* The Kubelet was informed of the new secure connection details.
Run 'kubectl get nodes' on the master to see this node join the cluster.
*********************************************************
3)接続状況を確認してみる。
各nodeが表示されていればOKかと思われる。
pi@raspberrypi-1:~ $ kubectl get node
NAME STATUS ROLES AGE VERSION
raspberrypi-1.local Ready master 21m v1.11.2
raspberrypi-2.local Ready <none> 6m v1.11.2
raspberrypi-3.local Ready <none> 3m v1.11.2
注意:raspberrypi-3.localがNot Readyになっていたが数分放置後にreadyに
変更された。
登録:
コメント (Atom)
terraform(moved.tf)のリソース名の修正方法について
以下の赤枠を直接変えてしまうと、ec2が削除されてしまいます。 これを維持したい場合について記載します。 以下に moved.tf ファイルを作成します。 以下のように、 from に修正前で、 to に修正したい内容を記載します。 以下のリソースにも修正を加えます。 terra...

-
apk add openrc --no-cache [ 以下のように使えることが把握できる ] alpinelinuxのサービスの再起動コマンド: rc-service nginx restart
-
以下のログに表示されている、" network unreachable resolving"は IPv6に関するメッセージではあるが、基本的にIPv4しか使用していないため このメッセージを消したい時の対策を以下に示す。 上記は、IPv4での名前解決...


